Your Cart is Empty
Customer Testimonials
-
"Great customer service. The folks at Novedge were super helpful in navigating a somewhat complicated order including software upgrades and serial numbers in various stages of inactivity. They were friendly and helpful throughout the process.."
Ruben Ruckmark
"Quick & very helpful. We have been using Novedge for years and are very happy with their quick service when we need to make a purchase and excellent support resolving any issues."
Will Woodson
"Scott is the best. He reminds me about subscriptions dates, guides me in the correct direction for updates. He always responds promptly to me. He is literally the reason I continue to work with Novedge and will do so in the future."
Edward Mchugh
"Calvin Lok is “the man”. After my purchase of Sketchup 2021, he called me and provided step-by-step instructions to ease me through difficulties I was having with the setup of my new software."
Mike Borzage
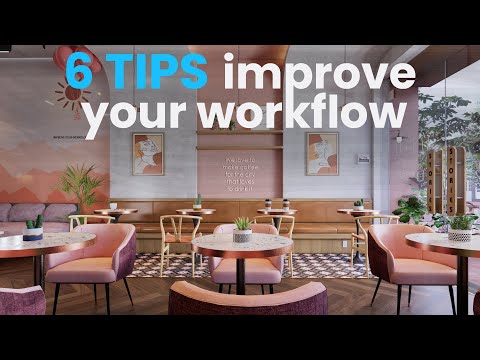
Tips, Tricks & Tools To Streamline Your Workflow With Enscape
May 01, 2023 3 min read

Working smarter, not harder, is the key to success in any creative field. If you're looking to maximize efficiency and streamline your workflow, Enscape is the perfect tool for the job. This blog post explores the best tips, tricks, and tools for optimizing your workflow with Enscape.
Speeding Up Workflow With Enscape View Management
By utilizing Enscape View Management, you can promptly create multiple angles for projects, hence saving time and energy. This would allow easy switching between different perspectives without leaving your current view. To hasten your workflow in Enscape, it is best to plan the composition of the render and create a few camera angles that will best capture the scene. Use View Management in the left-side window or press F as a shortcut to create these angles. Begin by setting up two or three views that will capture the essence of the desired action accurately, making any necessary adjustments later on, such as adding more details or making changes within SketchUp. In addition, you can produce presets from the visual settings window, either by creating a new preset or duplicating an existing one with slight variations to enhance your renders and explore the options that appear best. This enables users to have more control over their projects, resulting in better productivity, as they don't need to keep re-rendering for small changes they wish to make in their projects! Once you've established two or three views, you can move through them quickly, making any necessary modifications directly within SketchUp if desired, without additional steps. With these straightforward tips and tools at your disposal, accelerating your workflow using Enscape View Management should come naturally!
Mastering Batch Rendering For Maximum Efficiency
Save time and energy by quickly rendering multiple views at once. Utilize Enscape tips, tricks, and tools to master batch rendering and set up presets for convenient duplication and customization in future renders. View Management saves your preset with your chosen view, ensuring customization is available as required throughout the render process without sacrificing efficiency. With these strategies, Enscape allows you to cut down on render times while maintaining quality and accuracy.
Using Turbotop And Enscape Features To Streamline Sketchup Modeling Workflows
With Turbotop, you can ensure that the Enscape window does not minimize when clicking on modeling tools in Sketchup or other native modeling software. This allows users to keep their modeling space clear from the Enscape window taking up too much screen space. It also offers an option of using half the screen for Sketchup and the rest for Enscape when users wish to keep both windows visible simultaneously during workflow operations like editing model elements. Turbotop is a great tool that addresses this issue efficiently and effectively so users can smoothly carry out their tasks without any troubles going forward!
Efficiency Boost With The New Star Tool In Escape
With the Star Tool, users no longer have to scroll through all 2500+ assets available in Escape. Simply hover your mouse over any of the assets you use often and click on the yellow star icon. This will add the asset to your favorites and make it easier for you to find it in future projects. This process also applies to the materials library and can be used with other elements within the program as well. For example, if there are certain textures that you use repeatedly, adding them as favorites will make them much easier to find when needed. Even if it seems like a few seconds or minutes saved each time, with continued practice, this can save hours in just one week or month!
Save Frame Feature
Lastly, many users utilize the Save Frame feature which gives them a vertical aspect ratio while still keeping their modeling space clear from the Enscape window taking up too much screen space. This is an especially helpful feature if you don't prefer splitting your screens equally between two apps but would still like both windows visible simultaneously during workflow operations like editing model elements, etc.
Check out our very helpful Novedge Webinar to find out how to integrate real-time visualization and VR with Enscape,
Enscape integrates seamlessly into your current design program, letting you visualize instantly any changes in real time.
Connect with one of our experts at 866 362 8970 if you have questions about Enscape 3.3, or CAD solutions like Revit or SketchUp.
Products
Also in NOVEDGE Blog

Enhance Your Designs with VisualARQ 3: Effortless Geometry Extensions for Walls and Columns
April 30, 2025 8 min read
Read MoreSubscribe
Sign up to get the latest on sales, new releases and more …


